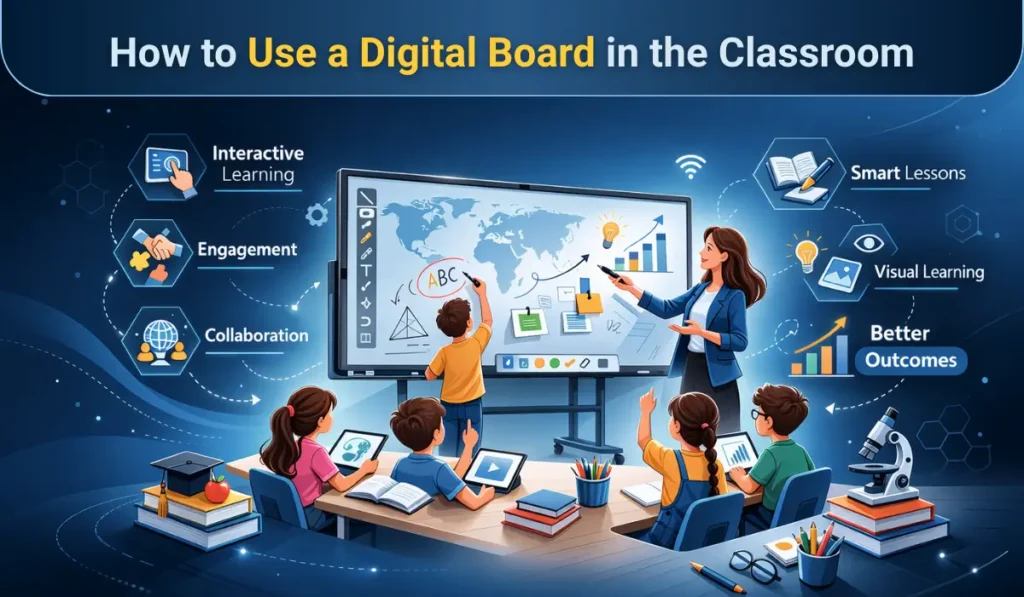
Learning how to use a digital board in classroom settings is becoming essential for modern educators. Across India, schools are rapidly shifting from traditional chalkboards to interactive flat panels to create smarter, more engaging learning environments. Digital boards are no longer a luxury; they are becoming a core teaching tool.
The transition is driven by the need for visual learning, hybrid education readiness, and government-led digital initiatives. Teachers who effectively use digital boards can improve student participation, concept clarity, and classroom efficiency.
In this complete teacher’s guide, you’ll learn what a digital board is, how it works, step-by-step setup instructions, practical teaching methods, and expert strategies to get maximum value from your smart classroom investment.
What Is a Digital Board in the Classroom?
A digital board (also called an interactive flat panel) is a large touch-enabled display that replaces traditional blackboards and projector-based smart boards. It allows teachers to write, display multimedia content, run apps, and interact with students directly on the screen.
Unlike old projector systems, modern digital boards offer 4K clarity, built-in computing, and smooth multi-touch interaction. This makes classroom teaching more dynamic, visual, and collaborative.
How Does a Digital Board Work?
A digital board combines display hardware, touch sensors, and embedded software into one integrated teaching device.
Touch technology explained simply
The screen detects finger or stylus input using infrared or capacitive touch sensors. Teachers can write, drag, zoom, and annotate directly on the panel, just like using a giant tablet.
Built-in Android/Windows ecosystem
Most interactive flat panels come with:
- Built-in Android OS for quick teaching tools
- Optional Windows OPS for advanced applications
- Preloaded whiteboard and screen-sharing apps
This eliminates the need for external computers in many classrooms.
Connectivity options (HDMI, Wi-Fi, USB)
Digital boards support multiple connections:
- HDMI for laptops
- Wi-Fi for wireless casting
- USB for pen drives and accessories
This flexibility allows teachers to switch between content sources easily.
Why Should Teachers Use Digital Boards in the Classroom?
Digital boards are not just about replacing chalk; they transform how students learn and interact. Schools that adopt interactive flat panels often report higher engagement and better academic outcomes.
How Does a Digital Board Improve Student Engagement?
Visual learning impact
Students understand concepts faster when lessons include diagrams, animations, and videos. A digital board makes abstract topics more concrete and memorable.
Multi-sensory teaching
Interactive panels support touch, audio, and visual inputs simultaneously. This multi-sensory approach caters to different learning styles within the same classroom.
Real-time interaction benefits
Teachers can annotate live, run instant quizzes, and invite students to the board. This keeps attention levels high compared to passive lectures.
What Learning Outcomes Improve With Interactive Teaching?
Better retention rates
Research and classroom experience show that students remember visual and interactive lessons longer than text-only teaching.
Collaborative learning
Digital boards support group problem-solving, peer presentations, and shared activities that build teamwork skills.
Faster concept clarity
Complex topics — especially in math and science — become easier to explain using simulations and step-by-step digital annotation.
Why Are Indian Schools Rapidly Adopting Digital Boards?
NEP 2020 push
India’s National Education Policy emphasizes technology integration and digital literacy in classrooms.
Smart classroom initiatives
Many state governments and private institutions are investing heavily in smart classroom infrastructure.
Hybrid learning demand
Post-pandemic education requires tools that support both in-class and remote learning — digital boards make this seamless.
How to Set Up a Digital Board in Your Classroom (Step-by-Step)
Proper setup ensures smooth performance and long device life. Follow these practical steps used by professional installers.
Step 1 — How to Install the Digital Board Properly
Ideal height and placement
Mount the board so the center is roughly at the teacher’s eye level. Ensure students in the back row have clear visibility without glare.
Wall mounting tips
- Use the manufacturer’s wall mount bracket
- Install on a solid concrete wall
- Maintain proper ventilation space around the panel
Power and safety checklist
- Dedicated power socket
- Proper earthing
- Surge protection recommended
Step 2 — How to Connect Internet and Devices
Wi-Fi setup
Connect the panel to the school’s Wi-Fi network through settings. A stable internet connection enables cloud apps and web browsing.
Laptop/mobile screen sharing
Use built-in casting tools to mirror:
- Teacher laptop
- Student devices
- Tablets or phones
Using HDMI and USB
HDMI provides the most stable wired connection, while USB ports allow quick access to files and peripherals.
Step 3 — How to Configure Initial Settings
Language and display settings
Set the preferred language, brightness, and resolution for comfortable viewing.
Touch calibration
Run the touch calibration tool to ensure accurate writing and smooth interaction.
User profiles
Create teacher profiles if multiple faculty members will use the panel. This keeps files and settings organized.
How to Use Digital Board in the Classroom for Teaching (Practical Guide)
Once setup is complete, the real value comes from effective classroom usage. The goal is to move beyond basic projection and use the board interactively.
How to Start a Lesson on the Digital Board
Opening whiteboard software
Launch the built-in whiteboard app from the home screen. Most panels provide multiple pen colors and page templates.
Writing and annotation basics
Use finger or stylus to:
- Write notes
- Highlight key points
- Draw diagrams
- Annotate over PDFs or images
Saving notes
Always save the session at the end of class. You can export notes as PDF and share with students via WhatsApp or LMS.
How to Use Multimedia for Better Learning
Playing educational videos
Use the browser or YouTube app to stream concept videos. Pause and annotate directly over the video when explaining.
Using images and diagrams
Import high-resolution diagrams for subjects like biology, geography, and physics. Zoom and mark important parts in real time.
Integrating YouTube and web content
Bookmark trusted educational channels and websites for quick lesson access during class.
How to Conduct Interactive Activities
Live quizzes
Use built-in quiz apps or web tools to run instant assessments during the lesson.
Polls and surveys
Quick polls help teachers check understanding without waiting for formal tests.
Student screen sharing
Invite students to cast their work onto the main panel for peer discussion and feedback.
How to Use Split Screen for Multitasking
Showing video + notes together
Split screen allows teachers to play a video on one side and write explanations on the other.
Comparing documents
Useful for language classes, proofreading exercises, and data comparison.
Demonstration mode
Keep instructions visible while solving problems step-by-step beside them.
Best Teaching Strategies Using Digital Boards
Technology works best when paired with strong pedagogy. These classroom-tested strategies help teachers maximize impact while keeping learning purposeful and student-centered.
How to Make Lessons More Interactive
Think-pair-share digitally
Display a thought-provoking question on the digital board and give students time to discuss in pairs before sharing responses. Use the board to quickly collect and highlight answers, making participation visible and structured.
Drag-and-drop activities
Design interactive exercises where students physically move items on the screen to match, sequence, or categorize concepts. This hands-on interaction improves engagement and helps reinforce learning through active participation.
Digital brainstorming
Use mind-mapping tools on the board to capture student ideas in real time during discussions. Seeing their contributions appear instantly encourages involvement and helps organize complex topics visually.
How to Use Digital Boards for Different Subjects
Mathematics
Use the board for step-by-step problem solving so students can clearly follow each stage of the solution. Graph plotting and geometry tools help visualize abstract mathematical concepts more effectively.
Science
Display simulations, labeled diagrams, and experiment videos to make scientific concepts more concrete. Annotating visuals helps teachers explain processes and structures with greater clarity.
Languages
Leverage annotation tools for grammar correction, sentence structuring, and reading exercises. Highlighting text and adding notes live helps students understand language patterns more quickly.
Social studies
Use interactive maps, timelines, and historical visuals to bring topics to life. Zooming into regions or events helps students build a stronger context and retain information better.
How to Manage Classroom Discipline While Using Technology
Keeping students focused
Use multimedia strategically rather than excessively to avoid overstimulation and distraction. Keep lessons goal-oriented so technology supports learning instead of becoming entertainment.
Screen control tips
Before class, close unused apps and organize required files for a clean teaching interface. A clutter-free screen helps maintain student attention and reduces technical interruptions.
Participation techniques
Regularly invite students to interact with the board through quizzes, annotations, or presentations. Active involvement keeps energy levels high and naturally improves classroom discipline.
Tips to Get Maximum Value from Your Digital Board
To fully justify your investment, adopt smart usage habits.
- Create reusable lesson templates to save preparation time
- Use cloud storage to access content from any classroom
- Conduct regular teacher training sessions
- Keep firmware and apps updated for smooth performance
- Use the stylus for precise writing instead of fingers
Schools that follow these practices typically see faster teacher adoption and better ROI.
How to Choose the Right Digital Board for Your Classroom
Selecting the right interactive flat panel ensures long-term satisfaction and performance.
What Screen Size Should You Choose?
- 55–65 inch: small classrooms
- 75-inch: standard classrooms
- 86 inch: large lecture rooms
Which Features Matter Most?
Prioritize:
- 4K resolution for clarity
- Minimum 20-point multi-touch
- Built-in teaching apps
- Reliable warranty support
Why Schools Prefer iSLate Digital Board
Many Indian institutions choose iSLate digital boards because they are designed specifically for local classroom needs. Schools highlight:
- Optimized for Indian teaching environments
- Strong nationwide service support
- Competitive pricing for budget-conscious institutions
You can explore models and specifications on islatetechnologies.com.
Final Thoughts: The Future of Smart Classrooms in India
Understanding how to use digital board in classroom environments is now a must-have skill for modern educators. When used correctly, digital boards transform passive lectures into interactive learning experiences that improve engagement, retention, and collaboration.
Indian schools are steadily moving toward smart classrooms, but success depends on proper teacher training and thoughtful implementation. Start small, focus on interactive teaching practices, and gradually expand usage across subjects.
If your institution is planning to upgrade, explore reliable interactive flat panel solutions from iSLate to build a future-ready classroom ecosystem.